Girl Scout Thin Mints


Calling all home cooks! Discover the joy of recreating the iconic Girl Scout Thin Mints at home with our foolproof recipe. Say goodbye to waiting for cookie season and hello to the satisfaction of baking these minty chocolate treasures from scratch!
Add this site as a preferred Google source!
This post contains affiliate links. As an Amazon Associate, I earn from qualifying purchases.
Why Are Girl Scout Thin Mint Cookies So Irresistible?
About a quarter of the approximately 200 million boxes of Girl Scout cookies that troops sell each year are Thin Mints. It is no surprise. These chocolate cookies with a surprisingly intense mint flavor are the most popular variety of cookies.
Although they may look a little boring compared to other Girl Scout cookies, they are utterly addictive. If you are not already a fan, try this recipe to discover what all the hype is about.
Why Are You Going To Love Homemade Thin Mints?
When cookie season rolls around shortly after the new year, many Girl Scout cookie addicts go a bit wild when it comes to ordering. After all, Girl Scout cookies are only available for a limited time.
If you learn how to make this Thin Mint recipe, you’ll be able to enjoy these fantastic mint cookies with chocolaty coating whenever you want.
Copycat Girl Scout Thin Mint Cookie Ingredients
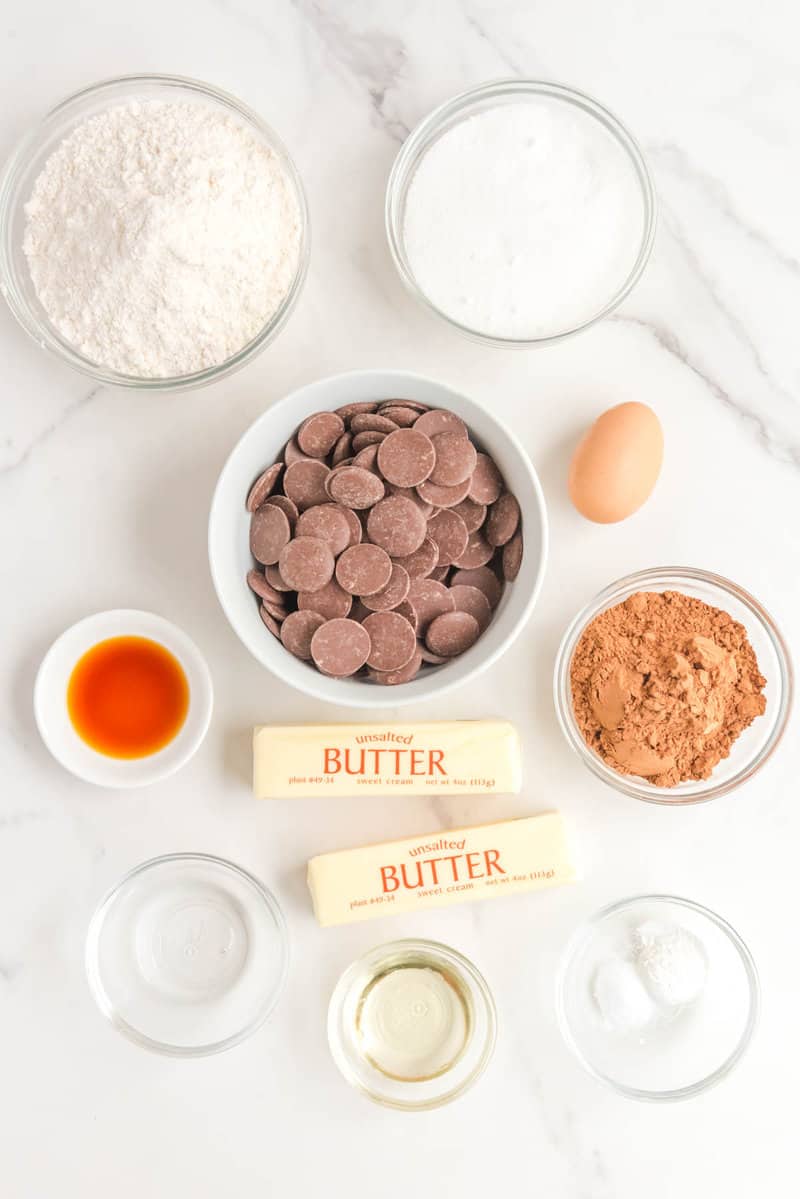
For the batter for this Thin Mint cookie recipe, you’ll need:
- All-purpose flour
- Cocoa powder
- Baking powder
- Salt
- Unsalted butter
- Sugar
- Egg
- Vanilla extract
- Peppermint extract
For the chocolate top, you’ll need:
- Dark chocolate melting wafers
- Vegetable shortening or vegetable oil
- Peppermint extract
How To Make Girl Scout Thin Mints Recipe
To mix the cookie batter:
- Take the butter out of the fridge and let it come up to room temperature to soften.
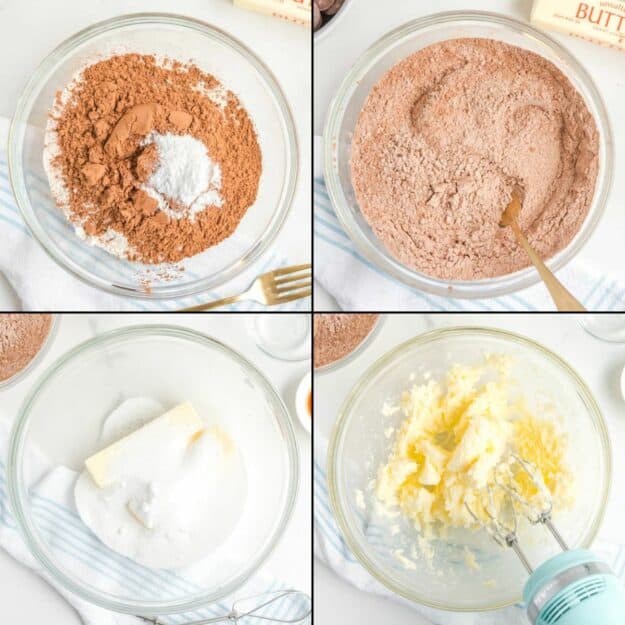
- While waiting, use a fork to stir together the flour, cocoa powder, baking powder, and salt. Set the well-combined dry ingredients aside.
- Once the butter is soft, put it and the sugar into a large mixing bowl.
- Cream the butter and sugar together using a stand or an electric handheld mixer with a paddle attachment. Start the mixer on LOW and slowly increase the speed to MEDIUM. Continue to mix until the butter is lighter in color.
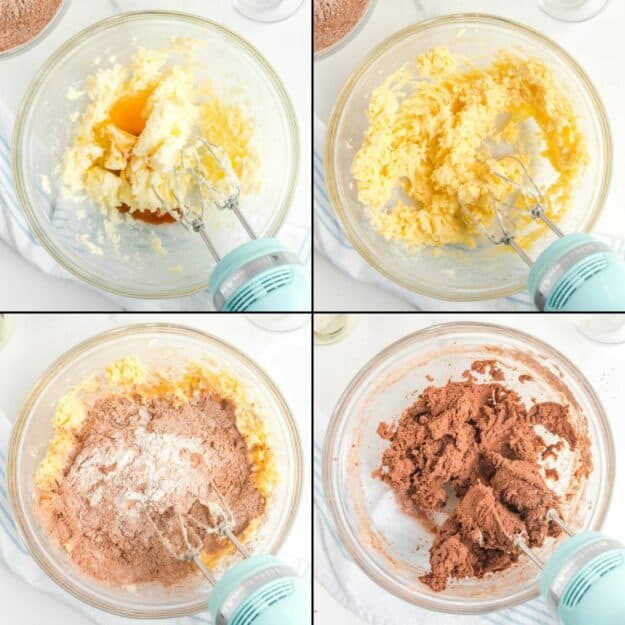
- Reduce the mixer speed to LOW and add the egg, vanilla extract, and peppermint extract. Slowly increase the mixer speed to MEDIUM and mix the egg and butter mixture until smooth.
- Add half of the dry ingredients to the butter and egg mixture. Continue to mix until fully incorporated. Repeat with the rest of the dry ingredients.
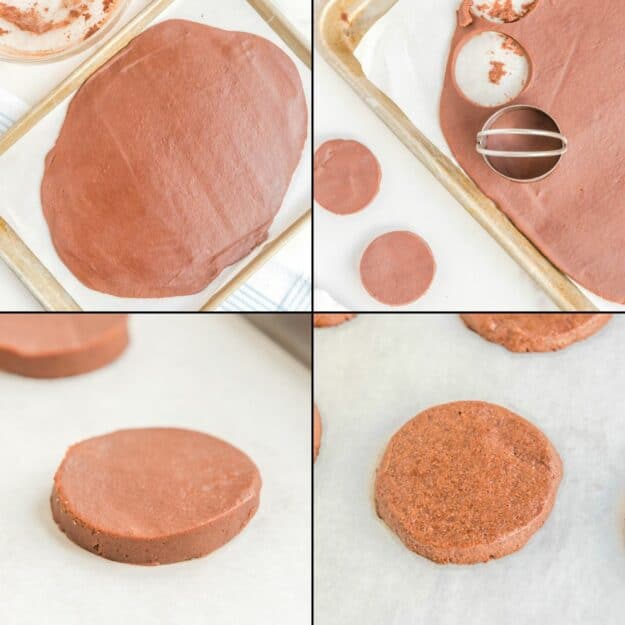
- Line half an unrimmed cookie sheet with parchment paper. Scrape the batter onto the sheet pan. Spread it out as evenly as possible.
- Lightly grease one side of another piece of parchment paper and lay it grease-side down on top of the batter. Use a rolling pin to roll the batter into an even quarter-inch thick slab.
- Chill the batter in the fridge for about an hour.
To bake the cookies:
- Preheat the oven to 350°F.
- Remove the chilled batter from the fridge and carefully peel off the top layer of parchment paper.
- Use a two-inch round cookie cutter to cut out the cookies. Use a spatula to transfer the cut cookies onto cookie sheets, leaving space between each cookie. You will need more than one cookie sheet.
- Bake the cookies for 10 to 12 minutes. Rotate the cookie sheets and swap rack positions halfway through the baking time.
- Allow the baked cookies to cool on the cookie sheet.
To finish the cookies:
- Place a wire rack over a parchment-lined baking sheet and set aside.
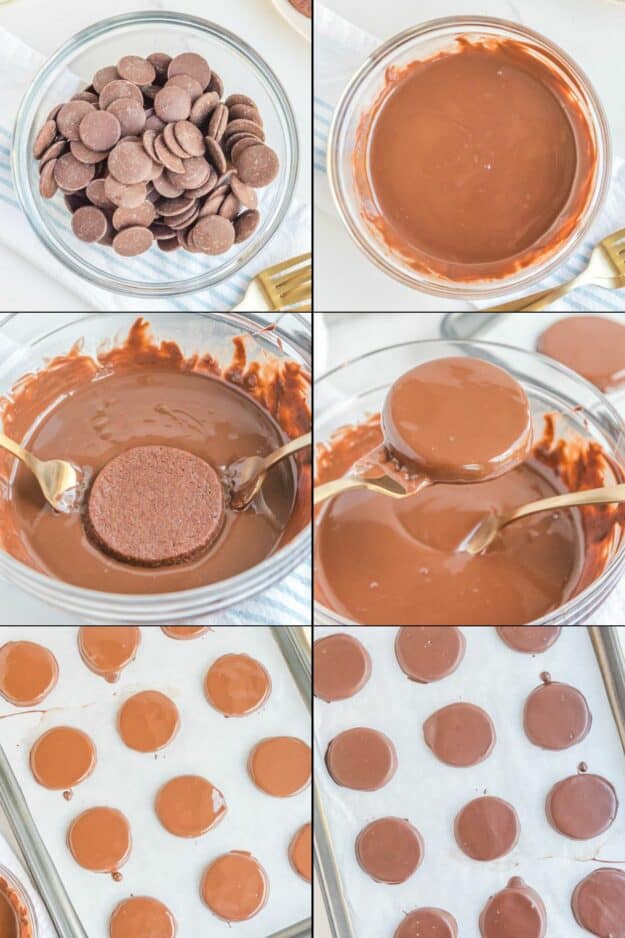
- Put the chocolate wafers in a microwave-safe bowl. Heat in the microwave for 30 seconds and stir. Continue heating and stirring until the chocolate melts fully.
- Stir the vegetable shortening and peppermint extract into the melted chocolate.
- Use a chocolate dipping tool or forks to dip the cooled cookies into the melted chocolate mixture. Let the excess chocolate run off. Place the dipped cookies onto the wire rack.
- Work quickly to prevent the chocolate from hardening. However, if it does, heat the chocolate for about 15 seconds in the microwave, stir, and continue dipping.
- Chill the dipped cookies for at least 30 minutes before serving.
What To Serve With Mint Cookies?
A glass of milk, coffee, or tea goes well with these cookies. Try crumbling a few of them and sprinkling the pieces over vanilla ice cream or yogurt.
How To Store These Cookies
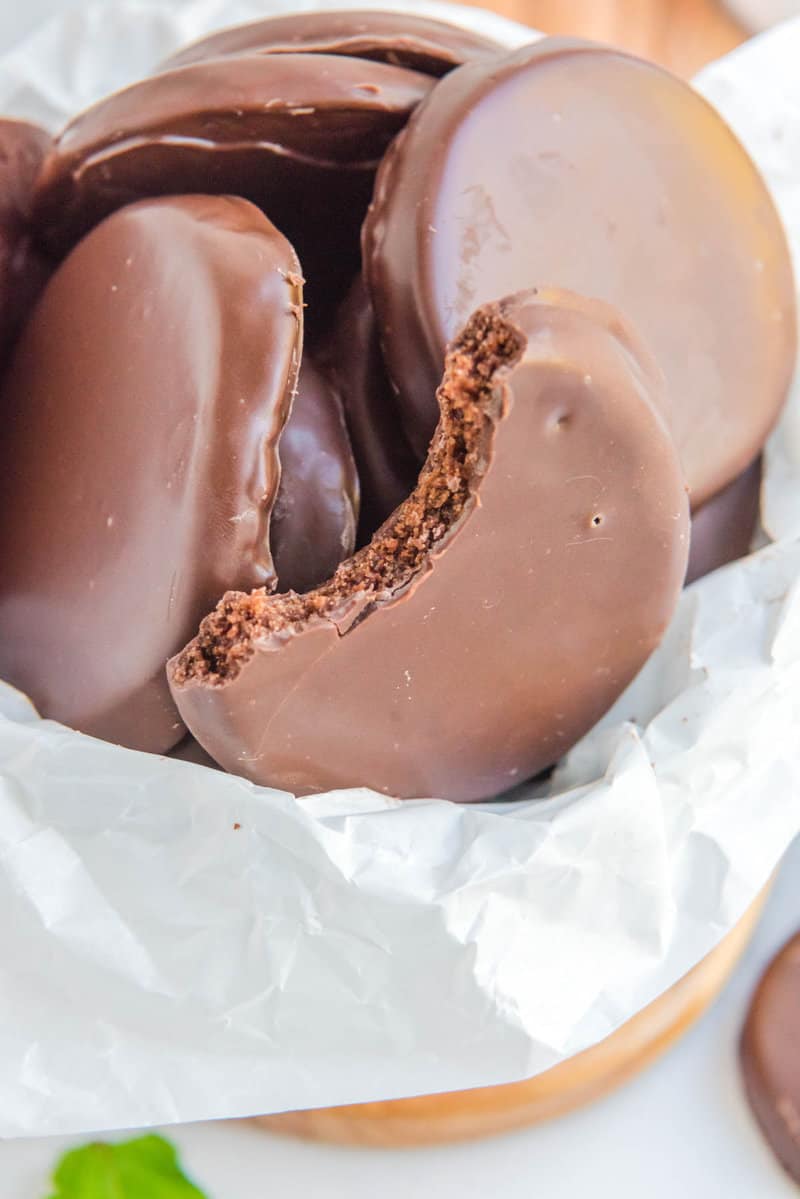
For the best texture, keep these cookies in an airtight container in the fridge or the freezer. Many people say the best way to eat Thin Mints is directly out of the freezer!
How Long Do They Last?
Homemade Thin Mints will stay fresh for up to a week in the refrigerator or up to two months in the freezer.
More Girl Scout Cookie Recipes

Popular Mint Recipes
- Chocolate Peppermint Bundt Cake
- Cream Cheese Mints
- Peppermint Bark
- Shamrock McFlurry
- York Peppermint Patty
Favorite Cookie Recipes
Check out more of my easy cookie recipes and the best DIY recipes on CopyKat!
Plus you’ll get great new recipes from us every week!
Girl Scout Thin Mints
Ingredients
Cookies
- 2 cups all-purpose flour
- ½ cup cocoa powder
- 1 teaspoon baking powder
- ½ teaspoon salt
- 1 cup unsalted butter softened at room temperature
- 1 cup sugar
- 1 large egg
- 1 teaspoon vanilla extract
- ¼ teaspoon peppermint extract
Topping
- 10 ounces dark chocolate melting wafers
- 1 tablespoon shortening or vegetable oil
- ½ teaspoon peppermint extract
Instructions
Cookies
- Preheat the oven to 350°F and line a large baking sheet with parchment paper.
- In a medium sized mixing bowl, combine flour, cocoa powder, baking powder and salt with a fork. Mix well and set aside.
- In a separate mixing bowl, cream together the butter and sugar using an electric hand or stand mixer. Mix until smooth and fully combined.
- Add egg, vanilla, and peppermint extract. Mix again until smooth.
- Add flour mixture in, half at a time, and mix until fully combined and dough-like. It will be thick.
- Remove dough from the bowl and place on the baking sheet with parchment paper. Using your hands, flatten the dough onto the baking sheet pressing downward.
- Use a rolling pin to smooth and roll out the dough to about ¼ – ½ inch thick.
- Place the baking sheet in the refrigerator to chill for 1 hour.
- When chill time is complete, begin cutting your dough.
- Using a 2-inch round cookie cutter, cut rounds from dough.
- Line 2 baking sheets with parchment paper.
- Place cookie dough rounds on the prepared baking sheets at least 2-inches apart. Do this until your baking sheet fills up.
- Bake for 10 to 12 minutes.
- When done, cool the cookies on the pan to room temperature.
- When your cookies have completely cooled, prepare the chocolate topping.
Topping
- Add the chocolate wafers to a microwave safe bowl. Microwave on 50% power for 1 minute. When done, stir well and add the vegetable oil and peppermint extract. Microwave on 50% power for 30 second intervals, stirring in between, until the chocolate is silky smooth.
- Using two forks or dipping tools, dip each cookie into the melted chocolate, covering it completely before placing it back on the baking sheet.
- Repeat this process, working one cookie at a time. When all cookies are covered in chocolate, place them back in the refrigerator for 30 minutes before serving.
Notes
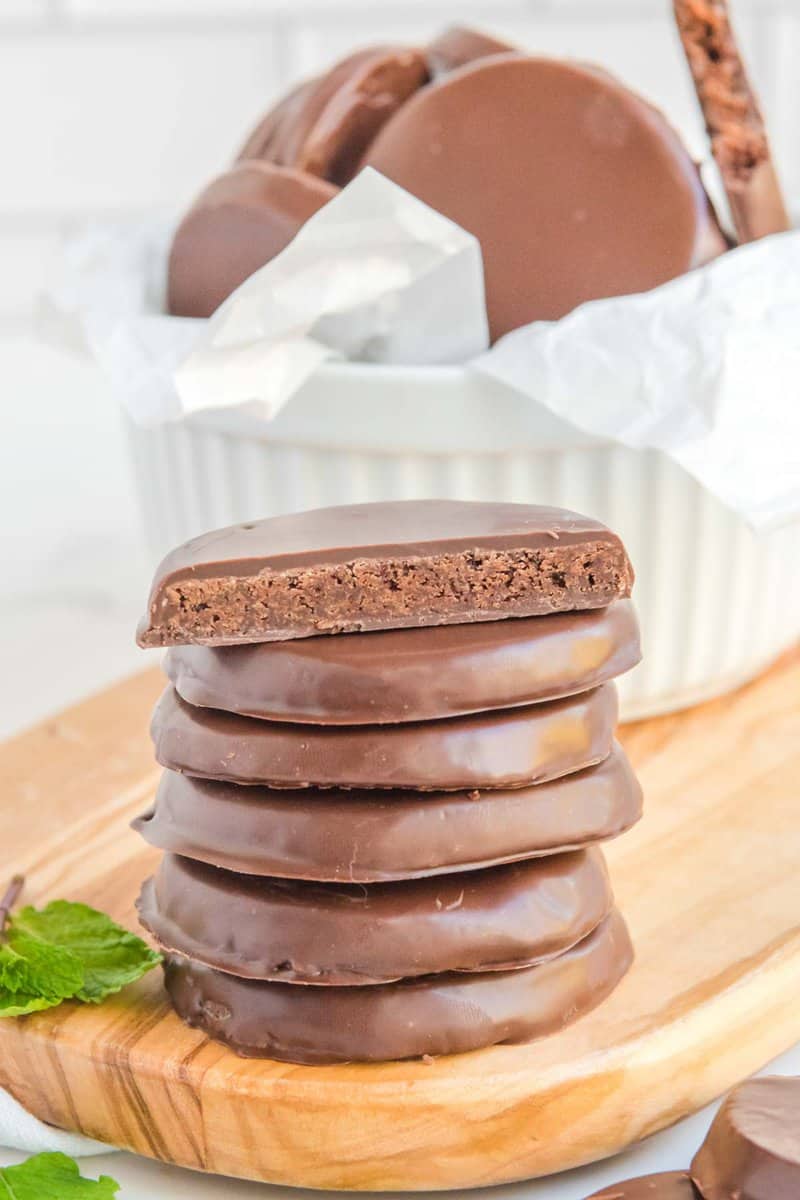
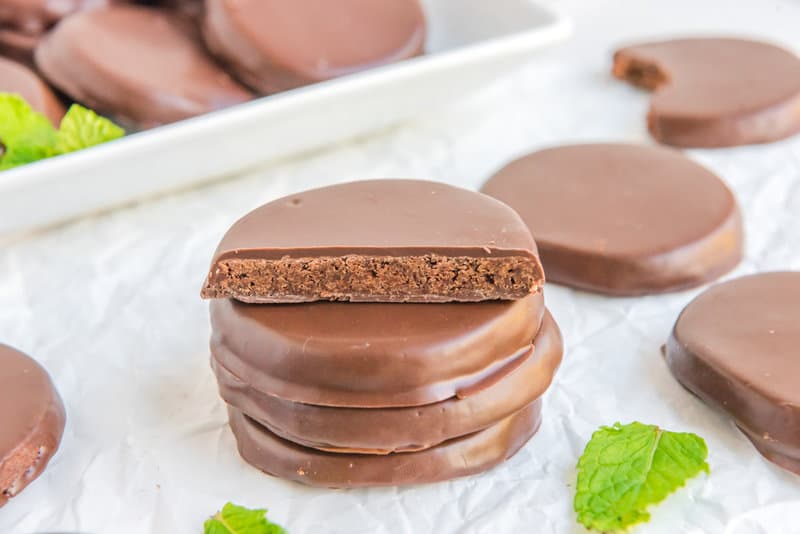
Presentation Tip: if you’re serving these cookies to a crowd, garnish with mint leaves for a wow effect.


I don’t know about anyone else but the Keebler Grasshoppers are every bit as good as the Girl Scout thin Mints and available at any store that carries Keebler cookies
I would agree with you!
Do I absolutely need a mixer? I have one, but not the attachment. Granted, yes, I could go buy one, but my mixer is out-dated, and I’m afraid I won’t be able to track down the attachment
(I will assume that this recipe is delicious though, I want to make it for my grandmother)
I would say yes. You are creaming butter in this recipe. I have never done it by hand, but you are trying to whip air into the cookie base for its structure.