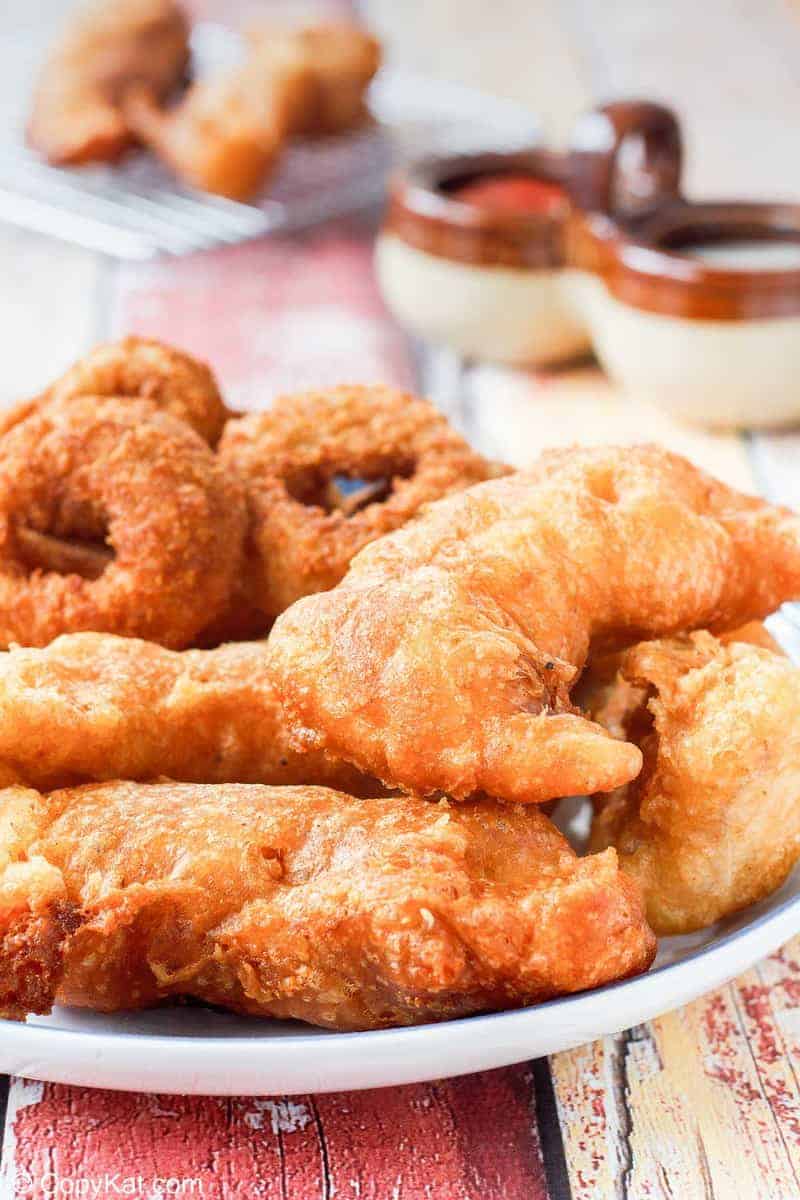
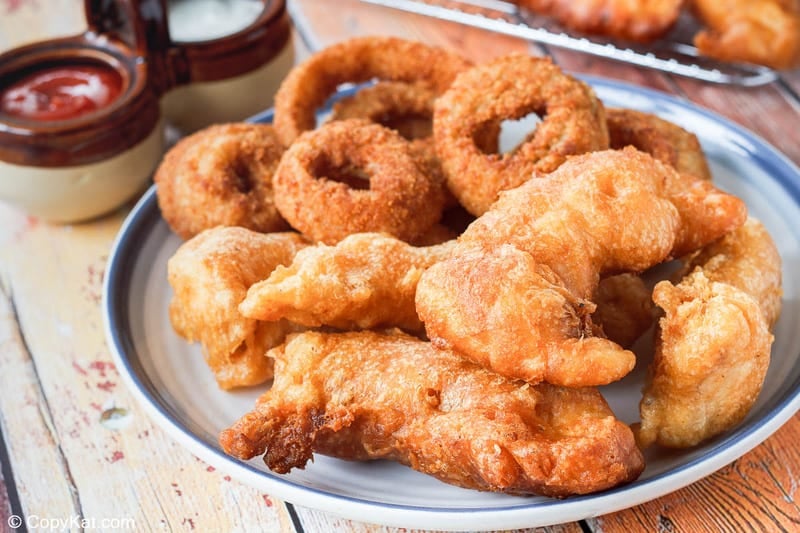
Long John Silvers Chicken Planks


My fascination with Long John Silver’s Chicken Planks began years ago when I first tasted that distinctive crispy batter. Something about the light, airy texture, and perfect golden-brown exterior kept me coming back for more. After countless visits to the restaurant, I became determined to recreate that famous batter at home. It took numerous experiments (and many batches of not-quite-right chicken), but I finally cracked the code to those perfectly crispy chicken planks that taste exactly like the real thing. The secret? The perfect ratio of club soda to dry ingredients creates that light, airy batter that shatters with each bite. No,w my family requests these “better than the restaurant” chicken planks at least once a month!
Add this site as a preferred Google source!
This post contains affiliate links. As an Amazon Associate, I earn from qualifying purchases.
Why This Recipe Works Better Than Others
This isn’t just any fried chicken recipe—it’s meticulously crafted to replicate Long John Silver’s signature batter that fans love:
- Restaurant quality: Saves money while delivering the exact same experience at home
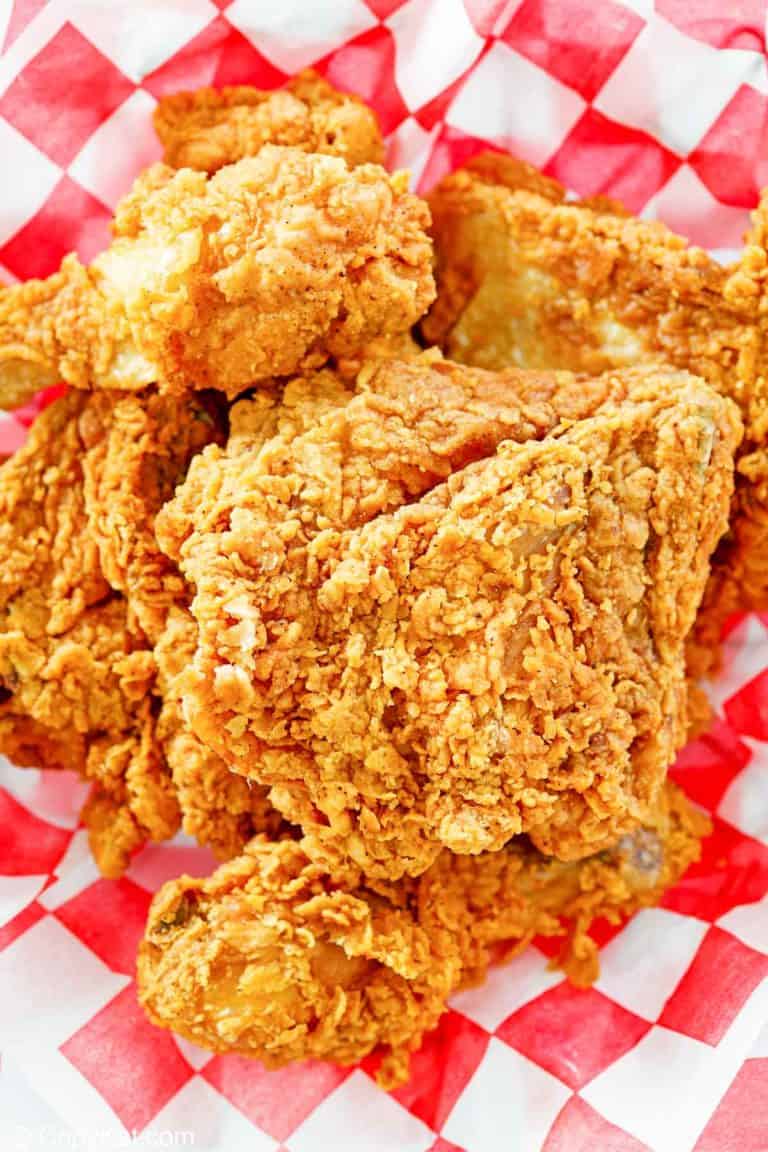
- Authentic taste and texture: The same light, crispy, slightly puffy batter that defines Long John Silver’s
- Simple ingredients: Uses basic pantry staples that you likely already have
- Foolproof technique: Detailed steps ensure perfect results even for beginners
- Versatile application: Works equally well with chicken, fish, or even vegetables
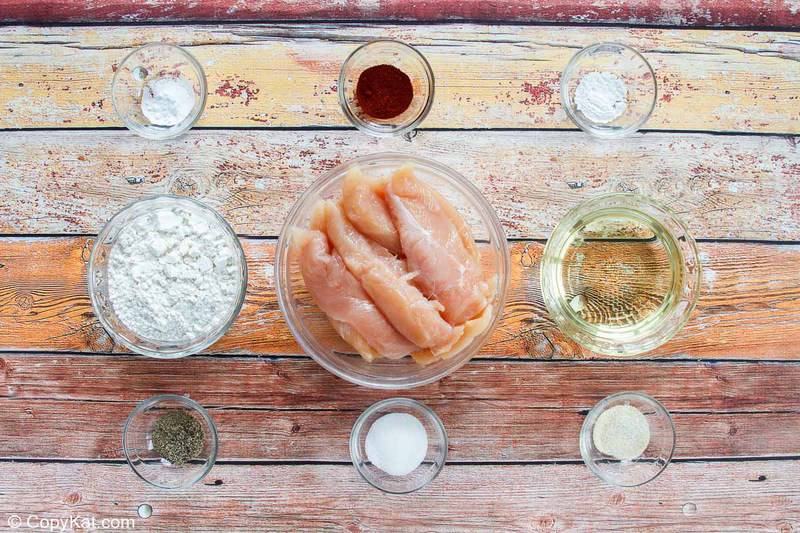
Ingredients
Here’s a list of what you need:
- Chicken tenderloins – Provide the perfect size and tenderness for authentic “planks”
- All-purpose flour – Creates the foundation of the batter structure
- Cornstarch – Lightens the batter and contributes to the characteristic crispness
- Sugar – Adds subtle sweetness and helps with browning
- Salt – Enhances all flavors and seasons the chicken
- Baking powder – Creates air bubbles that make the batter light and crispy
- Baking soda – Works with the club soda to create an even lighter texture
- Onion salt – Adds savory depth without visible onion pieces
- Paprika – Contributes subtle color and mild flavor
- Ground black pepper – Adds gentle heat and complexity
- Club soda – The key ingredient that creates the signature airy, crisp texture
- Vegetable oil – Provides a clean-tasting cooking medium for perfect frying
How to Make Long John Silvers Chicken
- In a deep-fryer or large, heavy pot, heat vegetable oil to 360°F.
- Place flour, cornstarch, sugar, salt, baking powder, baking soda, onion salt, paprika, and ground black pepper in a large mixing bowl. Stir or whisk to combine thoroughly.
- Add club soda to dry ingredients and stir to combine..
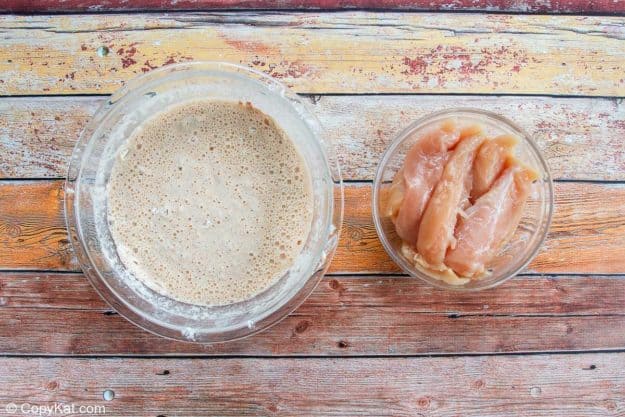
- Drop chicken tenders into the batter.
- Place battered chicken tenders into the hot oil, a few at once.
- Fry for 2 to 3 minutes on each side or until the batter is golden brown and the chicken begins to float to the top of the oil.
- Drain fried chicken tenders on a wire rack.
- Serve immediately.
Plus you’ll get great new recipes from us every week!
Crispy Long John Silver’s Style Chicken Planks
Ingredients
- 2 pounds chicken tenders
- 2 cups all-purpose flour
- 1/4 cup cornstarch
- 2 teaspoons sugar
- 2 teaspoons salt
- 1/2 teaspoon baking powder
- 1/2 teaspoon baking soda
- 1/2 teaspoon onion salt
- 1/2 teaspoon paprika
- 1/4 teaspoon ground black pepper
- 16 ounces club soda
- vegetable oil for frying
Instructions
- If you are not using a fryer, heat up 8 cups of vegetable oil in a heavy pot until the temperature reaches 360 degrees.
- Make the batter by combining flour, cornstarch, sugar, salt, baking powder, baking soda, onion salt, paprika, ground black pepper. Stir to combine all dry ingredients. Add club soda to dry ingredients. The batter will foam, continue to stir.
- Drop pieces of chicken into the batter. Coat chicken with batter, drop into the hot oil. Fry chicken for 2 to 3 minutes on each side or until the batter is golden and the chicken pieces begin to float to the top of the oil. Drain chicken on a wire rack.
Notes
Pro Tips for Perfect Results
- Cold batter is key: Keep the club soda refrigerated until ready to use—cold batter creates a crispier coating.
- Oil temperature matters: Too low (below 350°F), and your chicken will absorb too much oil and be greasy. Too high (above 375°F), and the exterior will burn before the chicken cooks through.
- The float test: Perfectly cooked pieces will float to the top of the oil when done.
- Never cover hot fried chicken: Steam will soften the crispy coating. Let it rest on the wire rack uncovered.
- Seasoning timing: For extra flavor, sprinkle a little additional salt over the chicken immediately after removing from the oil while it’s still hot.
Nutrition
Cooking Equipment and Tips
Use vegetable oil for frying. I think peanut oil would also work well, but it is more expensive.
I used my T-fal FR8000 Oil Filtration Ultimate EZ Clean Easy to Clean 3.5-Liter Fry Basket Stainless Steel Immersion Deep Fryer, 2.6-Pound, Silver. I like it because it regulates the heat very well, and it has a filter so you can reuse the oil.
Make sure the oil gets up to about 360 to 375°F. You must pat the chicken tenders with a paper towel, dunk them into the batter, and allow much of the batter to drip off.
Place the chicken into the frying oil gently and slowly. You want the batter to cook for a moment or two as the chicken is laid into the hot oil. This way, the batter won’t stick to the deep fryer basket.
The chicken is done when it begins to float, which takes about 5 to 6 minutes. You must flip the chicken over while cooking so both sides cook evenly.
I know you will enjoy these chicken planks.
Storage & Reheating Tips
Proper Storage:
- Cool completely: Allow chicken to cool to room temperature (but no longer than 2 hours for food safety).
- Store correctly: Place in an airtight container, separating layers with parchment paper to prevent sticking.
- Refrigerate promptly: Store in the refrigerator for up to 3-4 days.
- Freezing option: For longer storage, freeze in a single layer on a baking sheet, then transfer to a freezer bag for up to 2 months.
Best Reheating Methods:
- Avoid microwaving: This will make the crispy coating soggy and rubbery.
- Oven (preferred): Preheat to 375°F. Place chicken on a baking sheet and heat for 10-12 minutes until crispy and hot throughout.
- Air Fryer: 3-4 minutes at 370°F for perfect crispiness restoration.
- Toaster Oven: 5-7 minutes at 350°F on the “toast” setting.
Love fried chicken? Try these recipes!
- Chick Fil A Chicken Sandwich
- Chick Fil A Nuggets Recipe
- Homestyle Chicken
- Longhorn Parmesan Crusted Chicken
- Romano Chicken
What to Serve with Fried Chicken
- KFC Coleslaw
- Cornmeal Onion Rings
- Homemade Onion Rings
- Boston Market Mac and Cheese
- Panera Bread Mac and Cheese
- Texas Cheese Fries
- Broccoli Rice Cheese Casserole
Check out my simple chicken recipes and the best fast food copycat recipes here on CopyKat.com!


Second tome making it. LOVE IT!!! Didn’t use club soda just water and I give it a little extra seasoning.
I am so sad…this recipe did not taste like LJS at all. I really had no flavor. I think it definitely needs more salt but I’m not sure what else would make it taste more like LJS
More salt and MSG would add additional flavor.
I was not able to get the batter to stick. I have obviously done something wrong. HALP!!
Pat the fish dry first, then try to dip it.
I made this recipe tonight. It did not disappoint. I kinda cheated though and used 1 cup of regular flour and 1 cup of Kentucky Kernel seasoned flour. I even made some extra crispier with some of the leftover batter. It was spot on. Seasoning and all. Thanks for getting me on the right path for making this amazing chicken!
Trying to find where to post about a recipe I have been looking for for years. Don’t know where to look. The recipe is for the A&W French fries the old way. They were made with a mashed potato type. I used to work at one and remember how good they were as a kid. Can anybody point me in that direction. Been looking and found a simular recipe but want it without cheese. Thank you .
recipe definitely has right texture but the taste is a bit not there. Definitely needs more salt imo..at least double what is stated especially if you use onion powder . I dont buy seasonings with salt so I can control salt. either way though a great batter
Previous review is spot on. Texture is definitely the same, but the flavor was not. We ended up experimenting and found that adding a full tablespoon of Cajun seasonings (buy pretty much any blend) really did the trick. Long John Silvers has a certain ‘pepper-spice’ about it, and this matched nearly exactly.
Also, at least in our case the chicken ‘floated’ pretty quickly, so it was more of a timing event… about 5 minutes, and it took a 2nd/3rd batch (we only cooked two strips at a time), to get it perfect.
Either way, chicken was moist, and my (very) picky teenagers declared that “Dad’s fried chicken” was now accectible to be served again…and again… so that’s pretty much a victory in my book.
i DIDN’T READ THE ENTIRE ARTICLE, BUT i DON’T SEEM TO SEE WHETHER THE “CHICKEN TENDERS” ARE RAW CHICKEN–OR ALREADY COOKED.
(Just noticed my caps/visually impaired friend)
Anyway, if someone could let me know, that’d be super! TIA!
IMO, I am assuming it’s raw, but chicken “tenders” is a breaded think that comes in a freezer bag already cooked. That sounds gross to use! 🙁
Raw chicken–6 min to fry done sounds kind of short to me. I guess as hot as the oil is and if the chicken piece is cut small enough, it would probably get done. Any answers for me? TY!
I will try to answer your questions.
1. The chicken is raw to start with.
2. You need to buy chicken tenders they are a portion of the chicken breast, it is a specific cut of chicken that is naturally thin.
Or you could take a raw chicken breast and pound it with a meat mallet to even the thickness.
Stores do sell raw chicken tenders, but I prefer using boneless chicken breasts cut into strips. I hate taking the chance that the big tendon or vein wasn’t properly removed. I can’t stand chicken tenders that still have them because it’s horrible to bite into it.
Omg. I just learned what that gross thing I sometimes bite into at some restaurants is. (I always get the chicken tenders). Thanks!
Made a 1/2 recipe for tonight, substituted seltzer water for the club soda (was super fizzy), and will add in more salt for the next attempt. I started at 350 degrees with the oil, I think I’ll go a bit higher the next go around! I was concerned at first because I thought the batter may have been a bit runny?, but it wasn’t, I loosely mixed the ingredients, a bit lumpy, but not too much, dip and shake, drop in the oil and it fried beautifully! Stayed crispy until served and then they disappeared. Not entirely like the franchise, but close! Encore! Encore!
Hint from a former LJS Manager. Freeze the chicken plank, dip the chicken into the batter while frozen and fry.
Thanks for the Tip!!!
Is this exact recipe? Thanks
I made this today, the recipe does not taste anything the L.J.S. what a waste of my money.
I am very sorry you felt that way. What could have been different to make it taste like the real thing?
Has anyone tried the freezing and then using the air fryer? I am new to the air fryer its still in the box but I would love to tJ this.
Next attempt I will try with frozen tenders in a deep fryer. Kinda was hoping someone had already done this and posted
Do you use the same batter for the onion rings?
I have used this batter for onion rings & absolutely loved it!! We have also used this batter for veggies!
It is an extremely versatile batter.
Next time I make this, I’m going to set some batter aside, & try deep fried Oreos
How could this be adapted to an air fryer?
I don’t think the batter would stay on. So I don’t think it would work.
Freeze them after dipping them then put in the air fryer as you would frozen chicken breast
Great idea, I will have to give this a try. How do you keep all of the batter on while it freezes?
CANT WAIT TO TRY THIS. I LOVE CHICKEN AND ALSO LONG JOHN SILVERS
FISH. YUM!
This recipe sounds good! I have a thing for chicken.